Sometimes, the best way to stay motivated and organized is by seeing your progress visually. I am the type of person who feels more accomplished when I can clearly see what has been done and what still needs to be done. Seeing tasks being completed gives me a sense of achievement and productivity. With that in mind, I decided to create a visual organization board at home to help me track my daily routine. This board not only helped me organize my tasks but also gave me that sense of accomplishment as I checked off each item on my list as I completed it.
In this article, I will show you how to create a simple visual board that doesn’t rely on technology, so you can track your daily progress as well. If you’re someone who likes to see your achievements in a tangible way, this technique might be exactly what you need to boost your productivity and stay focused on your goals.
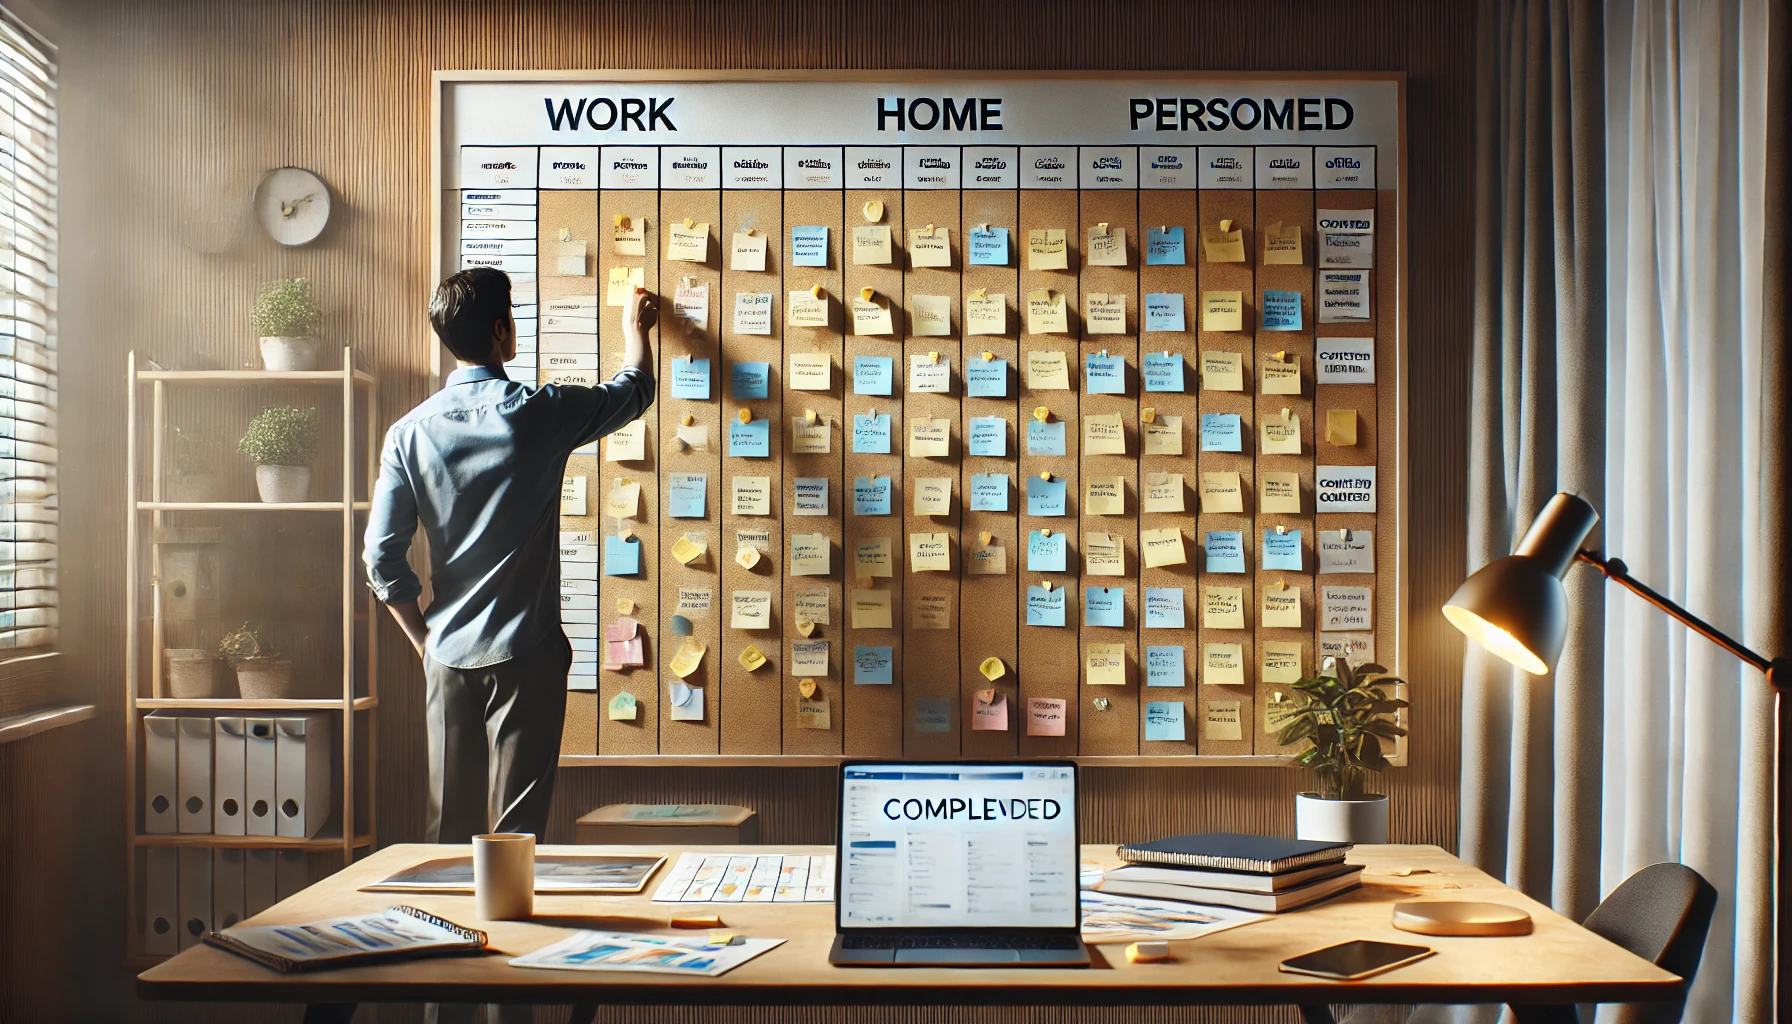
How to Create a Visual Organization Board
1. Choose the Type of Board
The first step in creating my visual board was to decide on the type of board I wanted to use. After researching some options, I opted for a cork board. It provided me with the flexibility to hang papers and cards, allowing me to move tasks easily as I made progress. But of course, you don’t have to follow the same path. There are many other options you can choose from, such as a magnetic whiteboard, a dry-erase board, or even a cork wall, which turned out to be an excellent alternative for those who like to interact practically with their goals.
It’s important that the board you choose is big enough for your needs. I prefer a large board, but if you don’t have much space, a small cork board or even a medium-sized whiteboard works just fine. The size will depend on how many tasks you plan to track and how visual you want the board to be.
Tip: If you don’t have much space, start with a smaller board. The most important thing is that it’s large enough for you to see your tasks clearly without overcrowding the space.
2. Create Visual Categories
One of the most important steps in creating my board was dividing tasks into visual categories. This made the organization much clearer and helped me focus on specific areas that needed more attention. The categories I chose were “Work,” “Home,” “Personal,” and “Projects.” Inside each of these categories, I wrote down the tasks or goals I needed to complete.
For example, in the “Work” category, I listed tasks related to my professional day, while “Home” included activities around my household, such as cleaning, organizing, and shopping. “Personal” covered health and well-being tasks, and “Projects” involved any larger goals or ongoing projects.
Tip: If you have many tasks to organize, consider creating subcategories within each area. This helps keep the board more organized and prevents it from becoming cluttered or overwhelming.
3. Use Cards or Post-its to Represent Tasks
One of the simplest ways I found to visualize my tasks was by using cards or post-its. I wrote each task or goal on a colored card and attached it to the board. When the task was completed, I removed the card or post-it, which gave me an immediate sense of progress. The best part was that I could move the cards from one place to another as I completed tasks or changed the priorities for the day.
I also used different colors for the cards, which helped me quickly visualize which tasks were more urgent or of higher priority. The colors made my board even more organized and made it easier to identify the most pressing tasks.
Tip: For even better organization, use post-its or colored cards to categorize tasks. This makes it easier to visualize and helps you quickly identify which area needs more focus or attention.
4. Establish a Daily Update Process
Keeping my board updated daily was one of the keys to its success. At the end of each day, I dedicated 5 to 10 minutes to review the board. This was a crucial moment to ensure I was accurately tracking my progress and also to adjust tasks and priorities as needed. I moved completed tasks to a “Completed” section and added new tasks for the next day.
This small daily routine helped me stay focused and allowed me to see exactly where I was in relation to my goals. Additionally, it allowed me to make adjustments when necessary, which was essential to staying on track.
Tip: The daily review of your board is a simple but highly effective habit. You can do it at the end of the day, before you wind down, or you can save it for the next morning, to mentally prepare for the challenges of the day.
5. Add Visual Rewards
To make the process even more motivating, I added a rewards section to my board. Each time I completed a task, I rewarded myself with something small but enjoyable. This could be something like an extra 10 minutes of rest or choosing the movie for the night. These small visual rewards helped encourage me to keep completing tasks and moving forward with my goals.
Having a reward for each task not only boosted my motivation but also made the process of working towards my goals more fun. Seeing my progress visually kept me energized to keep going.
Tip: Choose simple rewards that work for you but are motivating. This will keep your energy high and ensure that you stay focused on your goals without burning out along the way.
Benefits of Using a Visual Organization Board
The biggest benefit of using a visual board was the clarity and focus it provided. Every time I looked at my board, I knew exactly what had been done and what still needed to be done. The simple act of moving completed tasks to the “Completed” section gave me an immediate sense of satisfaction and motivated me to keep going.
Another major benefit was my ability to disconnect from digital distractions. Since I didn’t rely on apps or online tools, my board allowed me to focus on what was truly important without the constant distractions of email notifications or social media. This helped me be more productive and achieve my goals more efficiently.
Additionally, this system gave me tangible and practical organization, helping me see my progress more clearly. This, in turn, created a cycle of motivation and productivity.
Tips for Creating Your Own Visual Board
Creating your own visual board might seem simple, but there are a few details that can make all the difference. Here are some tips to ensure you create an efficient and motivating board:
Be Flexible
Your board should evolve with your needs. If you notice that a category isn’t working or if there’s a task that needs to be reorganized, don’t be afraid to adjust the board. Flexibility is key to having an organization system that truly works for you.
Keep Categories Simple
Avoid overcrowding the board with excessive categories or tasks that could be grouped together. Keeping categories simple and clear helps you maintain focus on the essentials, preventing the board from becoming cluttered or disorganized.
Review and Update Daily
Daily review is essential to maintaining the effectiveness of your board. By reviewing and updating your tasks every day, you ensure you stay in control of your goals and that the board is aligned with your priorities.
Conclusion
Creating a visual organization board was undoubtedly one of the best decisions I made to increase my productivity and keep my tasks organized. It helped me clearly visualize my progress, adjust my priorities, and, most importantly, stay motivated to keep moving forward.
If you also feel the need for a visual system to track your goals and tasks, I highly recommend trying this technique. A simple and practical visual board can transform your daily routine and help you achieve your goals with more focus and efficiency.